Category Archives: Yard and Garden Organization

Unofficial Projects

I haven’t posted for a couple weeks, but that doesn’t mean I haven’t been busy. Since I haven’t officially been doing any organizing projects, I thought I would give a quick re-cap of some of what I have been doing and share my very limited knowledge or the resources I’ve used.

Project #1 – I started my garden. Well, the seedlings for my garden. Though our sunny weather has been tempting me to get out and plant in the ground, I’m resisting because March in Idaho still freezes pretty hard at night. We are starting to see a little bit of green popping up!

Plants

I’m not even close to being a gardening expert, but this is what I do to get my seedlings started:

First, I determine what to start and when to start it.  Most plants shouldn’t be planted outside until the danger of frost has passed, which is around the beginning of May in my area. A quick look at the back of your seed packets will determine when and where you should start your seeds.  Many seeds will instruct direct sowing, which means planting them directly into your outside soil.  I wait on most of these until May. I might plant some cooler weather plants (peas, broccoli, lettuce, beats . . .) a bit earlier. Other packets suggest beginning indoors 6 – 8 weeks prior to planting.  Typically, I stick with my tomatoes, my peppers, and sometimes my cucumbers to begin indoors. This year I also started a few grasses and flowers for fun. My friend over at Kate’s Kitchen Garden begins a lot more than I do a lot earlier because she likes to get a jump on her garden (for serious gardening advice check out her blog). It all depends upon how much work you want to put into it. If you start indoors early, you will have to do a lot more transplanting into larger pots before taking them outside.  I will transplant, especially the tomatoes because in my experience they really need to be larger than the planter allows in order to have a better chance of survival in the garden. But I don’t mind a later harvest, so I don’t plant but what is absolutely necessary indoors.

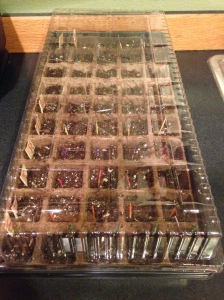
Next, I find what I will plant in.  This year I bought a seedling planter.  It’s convenient and easy to use and not terribly expensive.  In the past I have used egg cartons as starters. I also buy a bag of planting soil. I will dump it in a bowl, then slowly add water until the soil is damp but not saturated. Then I put the soil into the planters and make a small depression in each partition for seeds.  I will place 3 of 4 seeds in each partition just for a better chance, then thin each down to one sturdy plant later.  Finally, I cover the seeds with a little more soil and add just a little more water.  It is important to keep the soil damp at this stage, so if I have the store-bought planter I will use the lid on top as a sort of green-house and to keep in moisture while the seedlings are getting started.  I find a nice sunny place (usually by my kitchen window) and check daily to ensure the soil stays damp.

Project #2 – I started Dante Alighieri’s Inferno with my homeschool co-op literature class.

Inferno2

It was the class request (homeschool kids – sheesh), but we are having so much fun with this one.  I’m not sure if there is much of a market for resources for this text, but if needed, here is a link to one I have found particularly helpful (and free!) as I prepare.

Project #3 – We (and by we, I mean me – the hubby was on-board long ago) finally broke down and got the kids a puppy.  They have been wanting a dog for years. So after a little research and a lot of looking on Craigslist and in the paper we found a little labradoodle we’ve name Daisy.

Daisy

She’s awfully cute, but puppies really are a lot of work. We’ve been reading every article we can find and wading through all kinds of opposing views on how to and how not to train your puppy. We are new to puppies, so it can be confusing.  I’m still not sure if we are doing it right (check back with me in about a year or so), but click here for a link to an article on puppy training that seemed to present the least confusing method.

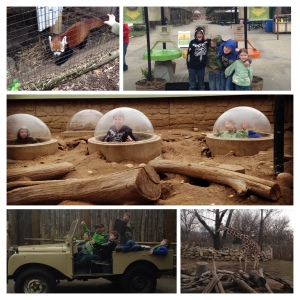
Project #4 – This is not really a project, but something to check off the to-do list.  We finally took the kids to the zoo!

 Kids at Zoo

There you have it . . . a sampling of what has kept me busy the past couple weeks.
Maybe This Time . . .

My husband said to me the other day, “You know, I kind of liked it when you were working on your blog.”  Code:  “You’ve really let things slide, lady.”  🙂 So I spent a few minutes looking at my past posts (way past, I know!) and I think I’m inspired again. I also felt a little nostalgia for our old home where I had things pretty well under control.  Boy, it’s hard to move!  Yes, things are put away, but I just don’t feel like we’re functioning at our best.  I’ve been WAY to easy-going lately. It’s time I got moving and organizing (and blogging) again.

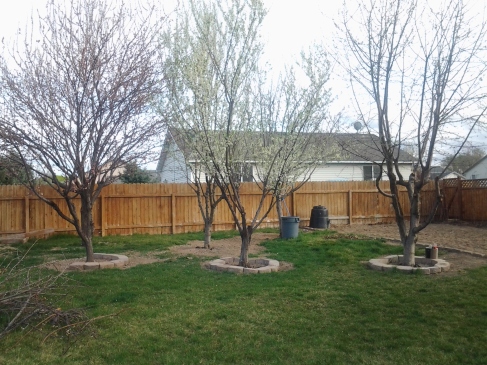
So you don’t think I’ve just been lazing around, I’ll let you in on what I have accomplished over the past month or so.  The weather here is finally getting nice (kind of – Idaho is pretty unpredictable in the Spring – one day will be 75 and the next we’ll get snow).  As soon as there is sun and some warmth to go with it I can hardly stand it and just have to be outside. Our new home has a HUGE yard that had been neglected, so my husband and I have been doing all kinds of trimming and weeding.  But this is my baby:

Image

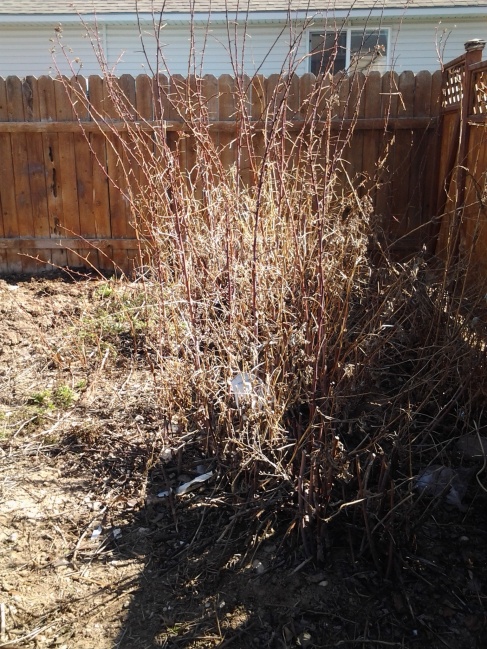
If you look carefully in the far right corner you’ll see something that made me jump for joy – RASPBERRIES! In my previous garden I tried several times to plant raspberries with no success, so I was ecstatic to discover these well-established raspberry vines. The only problem is they too had been neglected.  Here’s an up-close look at what I had to work with.

Image

A little on-line search yielded this very helpful video on trimming raspberries.

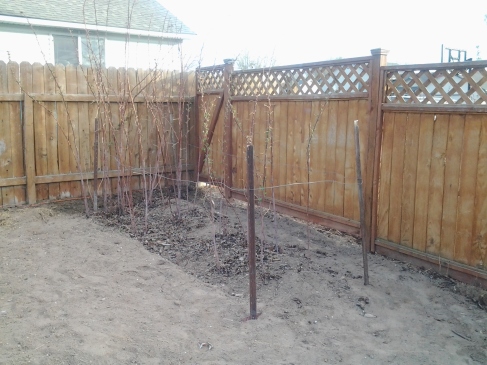
Then, donned with garden gloves and armed with trimmers I got to work. Several raspberry-prickle slivers later (along with some serious hand-cramping), this is the result:

Image

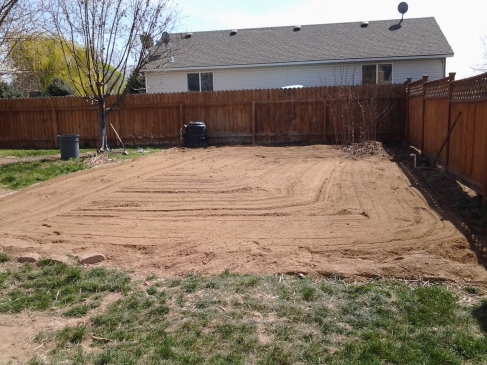
The garden area needed some serious care, so every free minute I spent weeding and digging up grass (which I actually enjoy – I just love dirt!), and even managed to get a little help from the kids. When the weeds were out, I harpooned my wonderful father into bringing over his rototill to work his magic.  Isn’t it purrrty?

Image

I have planted some frost-tolerant vegetables (peas, swiss chard, lettuce, cabbage), but I’m waiting until May 11, one day after our last recorded frost, in order to plant the rest.  I’m so excited! I’m particularly excited about this:

Image

Fruit trees!  I have a little orchard!  Can you blame me for not wanting to being inside?

After the “After”

I have spent the last few months pouring over articles, pictures, books and blogs researching methods of organization. It’s been inspiring and given me so much to aspire to in my own home organization. Yet, this morning I looked around and thought, “You are writing a blog on organizing!? You’ve got to be kidding!”  The couches were stripped of their cushions and blankets and pillows were strewn about the living room as the kids played “pillow house”; breakfast dishes were undone, crumbs and Cheerios on the floor and counters; laundry I had folded was still on the table; the floor needed mopping (again); the areas I have yet to get to in my week-by-week organizing were leering at me; and even my organized spots didn’t quite look as I thought they should.

I’ll be honest. I wanted to get angry — with the kids for making another huge mess, with my husband for not keeping up with my system exactly as I envisioned it, with myself for not keeping it together better. . . However, this morning I had managed to accomplish one thing on my to-do list – my quiet time. I had just finished a study on Jonah. We’ve all heard the story of Jonah and the great fish, but sometimes the end is left out of the Sunday School story version. Jonah is sitting outside Nineveh, angry with God for His compassion, watching and waiting for Him to destroy the city. God sends a vine to shade Jonah, then a worm that eats and destroys the plant, and finally a scorching wind that makes him miserable. Again, Jonah is angry, this time about the plant dying. God says, “Have you any right to be angry?” and makes the point that Jonah is more concerned about a plant that brought him comfort for a short period of time, than he is about a group of living, breathing people who make him uncomfortable.

In that moment of my frustration, as I started to get angry, immediately the thought entered my mind, “Have you any right to be angry?” So things got a bit messy. That’s life, especially life with four children. This incident got me thinking about how discouraging it can be comparing my home, even the organized areas to those pictures in books and magazines and the beautiful “after” pictures on blogs. The reality is, these pictures are taken at the moment when that area is at the absolute best it can be. These “after” pictures are the writers and bloggers putting their “best foot forward.” And truthfully, that is what I do in my after pictures as well. So, today I thought I’d do something a bit different. I’m going to put my “real” foot forward and show you some After the “After” pictures — my organized spots when life is actually happening.

I’ll start with my kitchen counters.


The first picture is my “after” picture. The second is after the after. Unfortunately it currently houses my seedling trays because it is the spot with the best sun exposure. And that’s how it will stay for the next month or so until I can plant.

This was after I organized one of the kid’s toy areas.  Below is what it looked like this morning (before I sent them back in to clean up).

And now my command center area.


Clearly, I need to attend to my “to do” box. I’m putting it on my to-do list now.  I could show you more, but I think you get the general idea. Things can’t always look like the “after” picture. We have to do some living too. The benefit of organizing is that you create an ease with which you can get back to that “after” look. My kids can quickly get their toys back in order because of their labels. I can quickly go through my to-do box and my filing box (if I don’t let it grow too large), and on planting day I’ll have my counters back. So, there you have it, real, but sometimes not-so-organized order.

Thrifty-tip Thursday

In keeping with the garden theme this week, here’s a thrifty tip I picked up from my parent’s home gardening techniques. I’m starting some of my seedlings this week. You can go to your local home and garden store and pick up one of these . . .

They aren’t terribly expensive. They run around $4 – $7. However, you can also use something most people have on hand – egg cartons.

I cut the lids off, then save them to place underneath for support. The biodegradable kind (left in picture) tend to get soggy and weak as watered so you can place a layer of plastic wrap between cells and lid.


For the styrofoam type, I use a toothpick to poke holes in the bottom for drainage.

The biodegradable egg cartons can be planted directly into the soil along with the plants. The styrofoam, of course, cannot be planted. I have my seeds, I have my egg cartons, and I have a tray I’m re-using from last year . . . I’m ready to plant.

Organizing My Garden Plans

Each year when I “plan” my garden, I follow the same process. First I select my seed packets using my “Oooo, that looks good!” or “Oh, that would be fun!” method. Then I pull out the seedling planters and start popping in seeds. When it comes planting time, I lay it all out in the garden, trying to keep in mind size when full grown so large plant won’t shade or over-grow small ones; then I start digging holes. I’m not sure it qualifies as a “plan”. It has worked reasonably well, but this year I want to do it right. This year, I truly want to plan. So, this week, as I start planting my seedlings (thanks for the reminder that it’s time, Kate’s Kitchen Garden), I also will be planning my garden layout so when planting time comes I know what and how much I will plant where.

Currently I have a traditional backyard garden measuring 18 1/2′ X 11′. I also have plans to add a couple raised beds this year. I’m working on finding the best ways to fill those spaces with what we will eat and preserve this summer. While working on my plans I found some great online planning resources.

The above, from Vegetable Gardening Online is an example of one of several free pre-made vegetable garden plans. The site is full of detailed instructions for when and how to plant just about anything, in any zone. There is even a “free garden planner” link that allows you to customize your garden size, then drag and drop vegetables onto the planner.

I am using a similar customizable garden plan from the Gardener’s Supply Company site because it allows for a larger garden layout. Check it out here.

I’ve been wandering around cyberspace today drooling over all the fabulous garden layouts. Here a few I especially loved.

This is a potager style layout is from a Squidoo page with several other ideas. Wouldn’t you love to have a space like this? I think I’d have to make my whole back yard my garden in order to do this, which would be fun but probably wouldn’t survive my kids.

Pizza anyone? This, found on the same site,  would be a lot of fun for kids.

This layout from Better Homes and Gardens is just my style. Very traditional, but a lot more organized than mine typically is . . . maybe this year!

Also from Better Homes and Gardens is this “Children’s Vegetable Garden” with detailed plans. I’d like to use one of my raised beds to do something similar. Happy planning!

My Chore Chart and Next Challenge

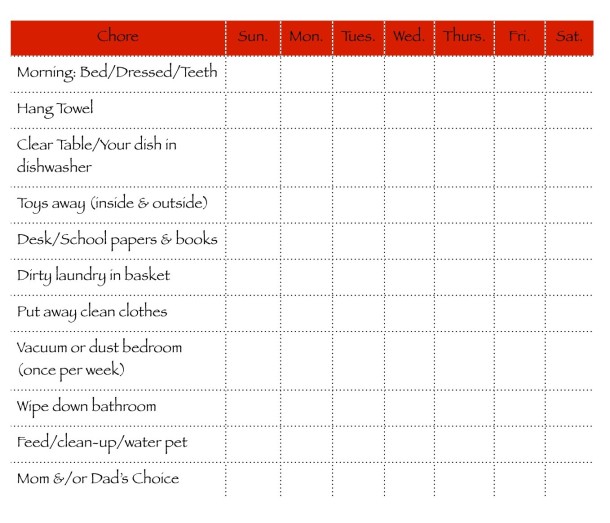
Just a quick post tonight. Here is the chore chart I came up with for my oldest son. The other’s are similar, but scaled down about according to each child’s age capabilities.

There are a lot of cute templates out there (see Friday’s post for links), but none of them quite fit exactly what I needed.  It’s simple, but to the point.

This week I am going to be organizing my garden plan. It’s not quite planting time yet, but my good friend and fellow blogger from Kate’s Kitchen Garden reminded me that it’s time to plant seedlings in my area. This week I will be planting my seeds so that I can nurse them inside until planting time. I will be working out exactly what I need to plant and getting my garden plan ready. To find out planting time in your area, click here. Just enter your zip code and find out when to plant at what time. Pretty handy!