Monthly Archives: March 2012

Recipe Binder Ideas

Whenever I start a new project I like to see what others have done. To be completely cliche, there’s no need to “reinvent the wheel”. I’m working on a recipe binder this week, so of course I scoured the web to see what I could find. Here are some links from which I’m pulling ideas.

One of my favorite organizing blogs, iheartorganizing, provides her helpful tips for organizing a recipe binder using recipes collected from magazines or printed from online sites.

This binder from prudentbaby.com includes suggested categories, and printable downloads (always a favorite feature for me!).

And then there’s Martha (Stewart). She always has clever ideas, like her above use of photo protecters for recipe cards. A word of warning about the link, it takes you to the beginning of a click-through montage of kitchen organizing tips. This one is number 34 of 47. It is well-worth looking through!

This binder from Flaming Toes absolutely amazed me. I don’t think I have it in me to do this, but if you are crafty there is a detailed how-to for this really cute hand-covered binder.

Here’s another how-to that blew my mind (in a good way) from Crate Paper Blog. They show step-by-step how to make your own binder from the “ground up”.

If you’re like me and you prefer to purchase a binder, I found these from Klassy Kitchen on zazzle.com. Unfortunately I had already purchased mine from Target. I love the design on these.

I realize the above is not a binder picture, but I borrowed a photo from another fun organizing blog I enjoy, My Color-coded Life.  Check out the link to read some good home-organization tips. Number five is her use of a recipe binder to make holidays simpler. . . a really clever idea!

This last binder how-to is my favorite, because it comes closest to what I plan on creating with my binder. From Decor-ganized Crafts, it combines meal-planning with recipe collecting. I have my ideas, now it’s time to start creating.

Thrifty-tip Thursday

As I sit in our rented cabin today watching the falling snow turn to a slushy rain, my thrifty tip doesn’t quite seem to mesh. But down in the valley and in most parts of the U.S. spring has indeed reared its head, meaning warm and sunny days are coming. Today’s thrifty tip was again, inspired by my very thrifty mother. As soon as weather allows she completely stops using her clothes dryer and hang-dries everything. I haven’t yet followed suit, but this summer I plan to. I did a little research to find just how much running a dryer costs.  According to Energy Miser 101, the average 40 minute load in an electric dryer uses about 5000 watts which adds up to about $3.96 per week, $16.98 per month (check out the complete post to find out how much other appliances cost to use – interesting!). Now that’s assuming you only do one load per day. With my family of six I use the dryer significantly more. I was an English major so it hurts my brain to try calculating the math on what my family uses, but it’s safe to say I could save quite a bit by giving my dryer a summer vacation.

Line-drying clothing requires clothes pins, so how do you store them? My mom came up with a pretty clever solution for her pins.  She took an old blouse she no longer wore, cut the arms off and sewed up the arm-holes (turn the shirt inside-out when doing this so ugly seams don’t show). Then she sewed together the bottom of her blouse (inside-out again to hide the ugly seams) so she had a “blouse-bag”. She hung this on a clothes-hanger, added her clothes pins and buttoned up the blouse. She hangs it inside her laundry room when not in use. When she has a load of laundry to hang outside, she simply grabs her bag and hangs it on the clothes-line where she is working. She’ll unbutton one of the blouse buttons and is able to easily reach in and grab one pin at a time as she hangs out her clothes . . . no more holding 30 pins in her mouth! Don’t I have a clever mother?

Spring Break . . . in the SNOW!

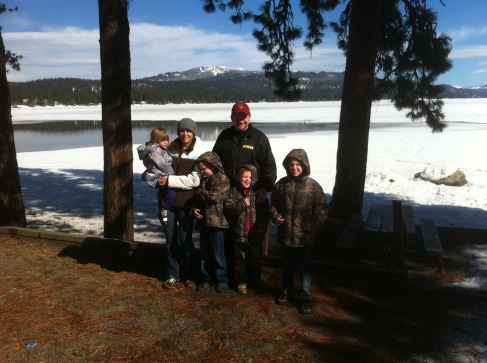
We are enjoying our week off in a cozy little mountain cabin. . . with SNOW!  The kids are thrilled since our winter in the valley has been unusually snow-free. We’ve been enjoying tromping through the snow, exploring the nearby town, swimming at the hot springs, and a crackling fire when the day is done. I brought along my mess of recipes to work on this week’s project: an organized recipe binder. No guarantees it will all get done before we get home — I’m on vacation after-all. 🙂 Hope you are all enjoying your spring – break or not.

Image

I’ve Finally Finished the Closet!

Spring has sprung, along with spring sports, spring vacation, spring visitors . . . to get to the point, I’ve neglected my blog and my current project for far too long. I finally finished organizing my daughter’s closet. Part of the project entailed moving her into her own room, which had been used for the play room.  This was her portion of her closet she shared with her brother . . .

. . .and this was the toy closet before we moved her in.

As I stated in another entry, my girl is a girly-girl.  She loves dresses and babies and anything pink. So before we moved her in, we painted it pink. . .

. . .very pink!  Here is what it looks like now.


I used one of my home-made storage bins for her off-season clothing.

I paired it with a pink tackle box her Grandma gave her for holding her treasures.  The other storage bin I placed inside the shelves of her dresser to hold her night-time pull-ups.

This is also her new shoe-shelf. It is right at her level, and we can close the door so they are out of sight.  I tried to keep her dresser mostly cleared, but placed two items: a small wooden box in which we store her barrettes and hair rubber-bands, and a headband/hat holder.

The headband holder was an idea I found on ipinterest’s blog. Check out her use of a vase here. I used my left-over fabric from my storage bin project and covered a plastic wipe container I ran through the dishwasher. The lid is remove-able so I placed some of her jewelry items inside, and it worked perfect for placing her little hats on top.

As I’ve discovered over and over in this organization process, the best organizing strategy is to get rid of what you don’t need. You simply can’t organize when you have too much stuff.  Here is the bag of donation items I pulled out of her drawers and closet.

YIKES! How does one so little already have so much?! It probably doesn’t help that I never say no to hand-me-downs. 🙂

My project took me two weeks instead of one, but that’s life . . . and it is Easy-Going Organizer, after-all.  This week, while we enjoy our spring vacation I am taking a break from the heavy lifting and will be working on organizing my mass of recipes into a recipe binder. Happy spring!

Another Random Act of Organization

I’m having organizer’s block on my little girl’s closet project. So, as my goal is to finish one project a week, and now it is Tuesday (2 days past my deadline), I decided to take a little break from thinking about the closet today and hit something small and attainable — my junk drawer.

I don’t have a before picture, but it was bad. A box broke spilling pencils and pens everywhere so I could hardly open the drawer — a sign it needs to be organized.  This was a spontaneous act so I used what I could find on hand to replace my broken box.  This is what I came up with.

I cut off the bottom of a couple Cheerio boxes, covered them in contact paper and I had two new boxes for my pens and pencils. I also got rid of stuff. This is the key component to being organized. You just can’t have so much.  I’m not quite at the minimalist stage — I know I still have more than I need — but I am down-sizing to bring order. You would not believe the number of pencils I had “before”. Here is my “after” shot.

Sigh. . . There’s nothing like a clean drawer. Maybe now my organizer’s block will be cleared and I can finally finish that closet.


Have I mentioned I’m married to the world’s nicest man?

I was a little stressed when my hubby called me from work today. When he got home he sent me out for some retail therapy, watched the kids, and cleaned the house! How lucky am I!?

My Crafty Storage Bins

This week I’m working on organizing my 3-year-old, girly-girl’s closet. I wanted some storage bins for her closet, but it’s the end of the month and Dave Ramsey says I have to stick to my budget. 🙂 Then I saw these on iheartorganizing made from cardboard boxes:

I like to save good, sturdy boxes, so I dug these out of my stash:

I purchased a yard each of fabric to match my daughter’s bedroom color scheme which came to about $7. Other supplies I needed were: strapping tape, spray adhesive, fabric glue, a fabric pencil and yard stick.  I was a little concerned about the corners on these shoe boxes, so I used the strapping tape to secure them on each box.

Next I placed the box on top of my fabric and traced the bottom. I measured the sides and added that measurement to two sides of the fabric around my traced box. I used spray adhesive to attach the fabric to the bottom of the box, then lifted and folded up the pre-measured fabric for two of the sides, using spray adhesive to attach these. I found that using a squeegee (I used my Pampered Chef vegetable scoop) was helpful in smoothing the fabric onto the box.  This left me with the bottom and two edges covered.


Now I needed to cover the remaining two sides. I measured the length and width, then adding about an inch to the length, measured and cut my fabric. I used fabric glue to fold under and secure the edges of the fabric, and the spray adhesive to attach it to the sides. It was helpful to roll up the fabric, then unroll and smooth it as I worked my way around these two sides. I tried to make the top edge flush and leave excess fabric at the bottom. Then I folded under the excess and secured it to the bottom with fabric glue.


Next was the inside. I measured and cut out a piece to fit the bottom first.

Then I completed the inside edges as I did the outside — two long strips at a time. I used spray adhesive, then folded under the ends  and secured with fabric glue.

I wasn’t completely happy with the outside corners on this box, so I secured black bias tape I had on hand to the corners with fabric glue. It gave my imperfect corners a much more finished looked.

I still had unfinished edges at the top, so using a trick my sewing-expert mother taught me, I created my own bias tape to finish the top.

Cut fabric the length and width desired, adding an inch or so to the length to allow for folding under to hide rough edges. The finished width of the bias tape will be 1/4 the beginning width. I cut mine into two 3-inch by 13-inch strips because I had a box 24-inches around the perimeter and I wanted about 3/4 inch wide tape.

Using an iron, press in half length-wise, wrong sides together.

Open this piece, then press 1/4 the fabric into the center on each side.

Fold in half again and press once more.

I secured this around the edges of my box with fabric glue, and repeated with box number two. Here is my final result – two cute and very inexpensive storage bins for my daughter’s closet.


I’m very happy with how they turned out. A word of warning about spray adhesive though — it is very sticky stuff and gets all over. Cover your area well! I missed covering a spot on my dining room table and now have a very sticky film that I’m having trouble removing (have any ideas for that?) Happy weekend!

Thrifty-tip Thursday

I ran out of time completing my own thrifty project – I’ll reveal it tomorrow. 😉 In the mean time, one of my good friends put a very clever and thrifty tip on her blog for controlling bugs. I’ll give you a hint.

Image

Go to Kate’s Kitchen Garden to find out how she uses duct tape to control bugs. It’s a good one!

My Closet Challenge Inspiration

This week I’m working on my daughter’s closet. As I work out the details, I’ll share with you some that I’m using for inspiration.

This is obviously a boy’s closet from Better Homes and Gardens, but I love this clever idea using hooks for each day of the week! That would certainly make things easy for a child dressing him/herself.


The use of bins in this closet from Parents magazine on the top shelf is an idea I plan to use in my own organization. I love bins!

This closet from Young House Love is so much fun with a cozy little hide-away space.

From House of Turquoise, I love the incorporation of books, toys and clothing in one closet. I actually have one of these banners and hadn’t decided what to do with it. . . I may have to pin it over the closet.

Here is one from HGTV that is absolutely unreal! Have you ever seen a kid’s closet this perfect? Not in my house. 🙂 The colors and bins are just my girl’s style though. She is all about pink.  These are ideas I’m using to help me put her closet together. Do you have a closet you love? I’d love to hear from you!


After the “After”

I have spent the last few months pouring over articles, pictures, books and blogs researching methods of organization. It’s been inspiring and given me so much to aspire to in my own home organization. Yet, this morning I looked around and thought, “You are writing a blog on organizing!? You’ve got to be kidding!”  The couches were stripped of their cushions and blankets and pillows were strewn about the living room as the kids played “pillow house”; breakfast dishes were undone, crumbs and Cheerios on the floor and counters; laundry I had folded was still on the table; the floor needed mopping (again); the areas I have yet to get to in my week-by-week organizing were leering at me; and even my organized spots didn’t quite look as I thought they should.

I’ll be honest. I wanted to get angry — with the kids for making another huge mess, with my husband for not keeping up with my system exactly as I envisioned it, with myself for not keeping it together better. . . However, this morning I had managed to accomplish one thing on my to-do list – my quiet time. I had just finished a study on Jonah. We’ve all heard the story of Jonah and the great fish, but sometimes the end is left out of the Sunday School story version. Jonah is sitting outside Nineveh, angry with God for His compassion, watching and waiting for Him to destroy the city. God sends a vine to shade Jonah, then a worm that eats and destroys the plant, and finally a scorching wind that makes him miserable. Again, Jonah is angry, this time about the plant dying. God says, “Have you any right to be angry?” and makes the point that Jonah is more concerned about a plant that brought him comfort for a short period of time, than he is about a group of living, breathing people who make him uncomfortable.

In that moment of my frustration, as I started to get angry, immediately the thought entered my mind, “Have you any right to be angry?” So things got a bit messy. That’s life, especially life with four children. This incident got me thinking about how discouraging it can be comparing my home, even the organized areas to those pictures in books and magazines and the beautiful “after” pictures on blogs. The reality is, these pictures are taken at the moment when that area is at the absolute best it can be. These “after” pictures are the writers and bloggers putting their “best foot forward.” And truthfully, that is what I do in my after pictures as well. So, today I thought I’d do something a bit different. I’m going to put my “real” foot forward and show you some After the “After” pictures — my organized spots when life is actually happening.

I’ll start with my kitchen counters.


The first picture is my “after” picture. The second is after the after. Unfortunately it currently houses my seedling trays because it is the spot with the best sun exposure. And that’s how it will stay for the next month or so until I can plant.

This was after I organized one of the kid’s toy areas.  Below is what it looked like this morning (before I sent them back in to clean up).

And now my command center area.


Clearly, I need to attend to my “to do” box. I’m putting it on my to-do list now.  I could show you more, but I think you get the general idea. Things can’t always look like the “after” picture. We have to do some living too. The benefit of organizing is that you create an ease with which you can get back to that “after” look. My kids can quickly get their toys back in order because of their labels. I can quickly go through my to-do box and my filing box (if I don’t let it grow too large), and on planting day I’ll have my counters back. So, there you have it, real, but sometimes not-so-organized order.